a tutorial
I have been using the adorable Pink Petticoat images on a few cards. Since Pink Petticoat images come in a different format than the usual digital stamps, I thought I would do a little tutorial on how to use Pink Petticoat images in Word.
Pink Petticoat's digital images come in "sheets." It's different from individual digital stamps that usually have either a white background or a transparent background. Pink Petticoat's images come in like this:
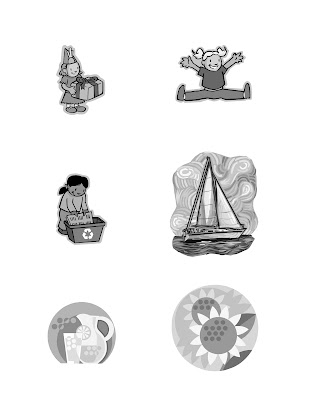
I created a sample using images from Clipart to avoid any copyright issues, but this is what you get when you purchase Pink Petticoat images. She usually includes several sheets in a set. For example, there is usually one sheet that has both the images and sentiments and there will be one sheet that has only the images. Some of the bigger sets/kits contents four or five sheets of variations of images and sentiments.
After downloading the files, you have the option of printing all the images out or there is a little trick that you can do in Word that helps you select only the images that you intend to use. Here is how:
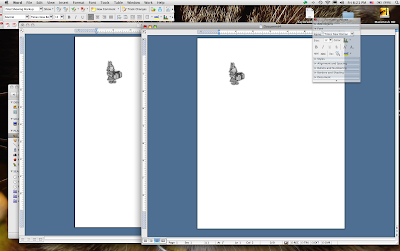
First, open two blank documents in Word. The reason for that is that I use one document as a holder for the sheet-image and the other one to tile or arrange the images that I want to print out. You can name the documents as Sheet Images and Print to help you remember which one to use. I'll use those two names to help me here. After creating the blank documents, click on the Sheet Images document then go to Insert on your menu bar, go to Picture. Then on the drop dowe select From File... to load your sheet-image wherever you stored it.
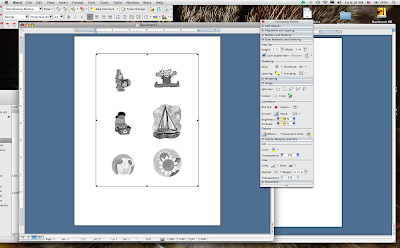
Picture 1
It should look like Picture 1 above after the sheet-image is loaded. When you click on the loaded sheet-image, the Formating Palette (the long rectangular box with lots of tools) should pop out. Then go to the Image category.
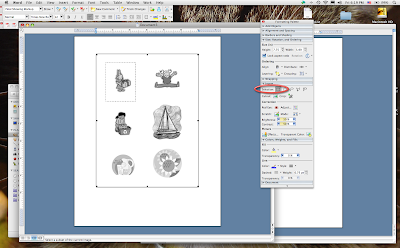
Picture 2
Under the Image category, find the Selection Tool (it looks like a dotted rectangle) and click on it. The use your mouse to click and drag the area or image that you want, as shown in Picture 2. In Picture 2 you can see that I selected the image of the girl holding a present and it's surrounded by the dotted rectangle. After the image is selected, go back to the Image category under the Formating Palette again then click on Cutout.
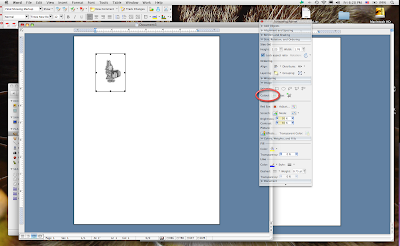
Picture 3.
Don't panic! If your image looks like Picture 3, it is what you are supposed to see! We will come back and fix this later. Now, with the remainder of your image selected (girl with present), either right-click your mouse or go to Edit on your menu bar and Copy the image.
Picture 4
Then go to the Print blank document, right-click or go to Edit on your menu bar then Paste. It should show the image on your second document as shown in Picture 4. From here you can resize and arrange the image.
Now to fix the sheet-image. Click on the Images document that you loaded the sheet-image with. Go to the menu bar and click on Edit then click on Undo Cutout. This should give you all the rest of the sheet-image that was cutout back to you like in Picture 1.
All you need to do is to repeat this process until you fill up your Print document with the images that you intend to use in your next projects! If you want to load a different sheet-image, just delete the sheet-image that you are done with and load another one! Don't worry, this won't hurt your original files!
Don't forget to leave extra spaces when you are tiling your images if you are planning on using a die to cut them out. I learned this the hard way!! If you are not sure about the sizes and spaces, you can always print out your Print document onto a piece of plain printer paper and see if the sizes and spaces are what you wanted then you can adjust them from there!
This trick will also help with bigger images such as the Skyland Birds image from Hero Arts. The last two times, I only used the birds part of the image. So what you can do is to select that section of the image, cutout the rest, then copy it onto your print document then resize. It saves paper and ink if you are not planning on using the whole image.
I didn't known this tutorial would be so wordy.... I am really hoping that I am making sense here.... I want to make it clear that I don't have any association with Pink Petticoat. I just love her cute and whimsical images. As far as I know, Pink Petticoat is the only place that sells digital images like this. I would be very happy even if this only helped one person. I thought that I would try my best to support talented artists out there because they all inspired me greatly on my creative adventure and I am very grateful for it!
I really hope this helps. Please leave me a comment and let me know what you think about this tutorial or if I am making sense or how I can make it better. I would be happy to hear from you! Please don't hesitate to ask any questions if I didn't explain anything well. I will do my best to help you.
Thanks for stopping by!


Comments
Sorry if I ask too much...
Thanks